Think of how many times you have been too tired at the end of the day to make dinner. I know that at the end of a long day, the last thing I want to do is spend an hour or more making dinner, then spending another half an hour cleaning up. We are all busy. I typically end up working 60+ hrs a week, so my nutrition, work out plans, and the cleanliness of my house all take a backseat.
There is a solution, and I want to share it with you! Yep, meal planning. We’ve all heard of it, but very few of us actually do it. Why? I know the people I’ve talked to just don’t know how to even start. I’ll tell you how in some easy steps! It’s not as hard as it sounds, and it’s SO rewarding!
TRUTHS: Yes, it’s more money up front. And yes, you do spend 4-6 hours in one sitting cooking, preparing, and chopping up food. I won’t lie. However, the reward for your efforts is seriously the best thing you can do for yourself and your family.
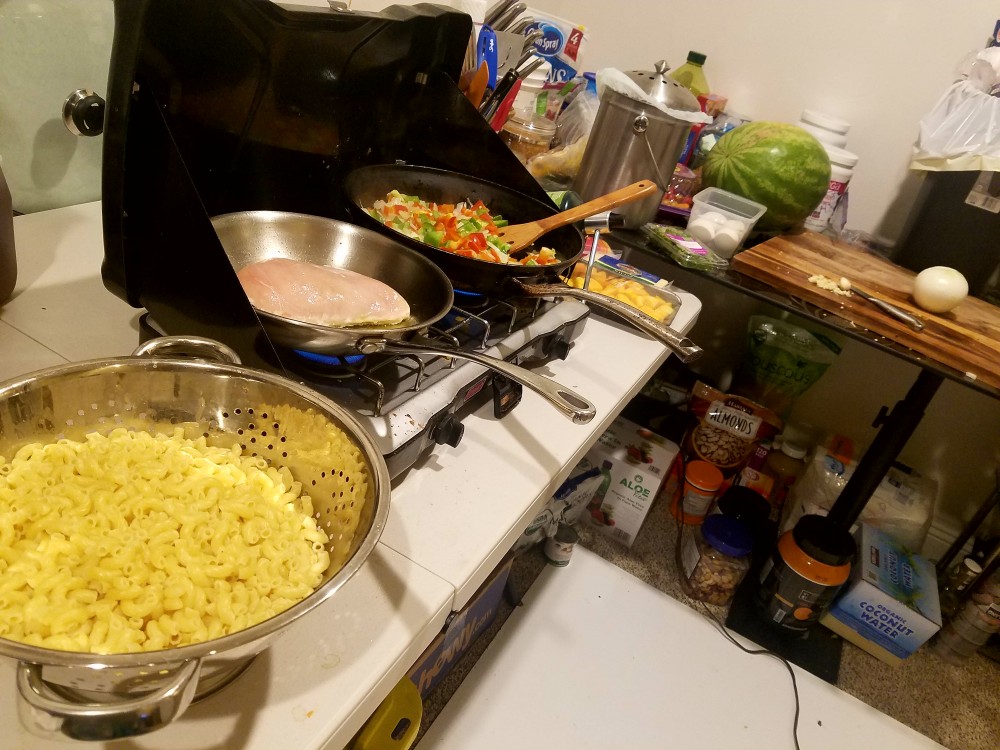
Here’s a secret… Right now, I don’t have a kitchen. Or a stove. Or a full fridge. I have a small beer fridge, a deep freezer, and a propane camping stove. We also have a toaster oven and a grill. Thanks to a kitchen flood that turned into a giant house-remodel, we haven’t had one for almost a year. So, I needed to get creative. We were sick of eating frozen skillet meals, and sandwiches. I wanted to actually make family dinner. I wanted to eat healthier and stop making up excuses why we were eating like crap.
Benefits
-You get delicious, healthy meals for breakfast, lunch, dinner, and all the snacks in between.
-You don’t have to cook throughout the week.
-You don’t go hungry and have easy snack options.
-Your grocery bill actually goes DOWN after your initial “stock-up” run.
-You make what you want.
-Even for the busy lifestyle, this isn’t a chore.
-You get more time after work every night to unwind and do what you want.
So how do you do it? I’ll break down my steps on how I have been meal planning. This works for me, but don’t hesitate to change things up if it doesn’t work for you.
Step 1: Plan
I start my meal plan by deciding what I want to make for each meal. I have 3 meals, and 3 snacks every day, spread out throughout the day. So, I plan out each thing I’ll eat every day first.
Once I’ve decided what I want for the week, I make up my shopping list for the week. Break down the ingredients per meal. That way, you don’t end up buying more or less than you need. An example meal plan for me looks like the table below. You’ll have leftover ingredients from each week, of course. I don’t include Saturday because that’s the day I eat my leftovers so they don’t go bad, and when I also get a “cheat” meal.
As far as the shopping list goes, obviously, I only put the ingredients on the list that we needed. We typically spend $40-$80/week in groceries, depending on what we eat.
Sunday |
Monday |
Tuesday |
Wednesday |
Thursday |
Friday |
Blueberry Pancakes |
eggs, spinach w/ balsamic |
2x hard boiled eggs, BB muffin |
eggs, spinach w/ balsamic |
2x hard boiled eggs, BB muffin |
Goat cheese & tomato scramble |
Shakeology |
Shakeology |
Shakeology |
Shakeology |
Shakeology |
Shakeology |
Salad & snacks |
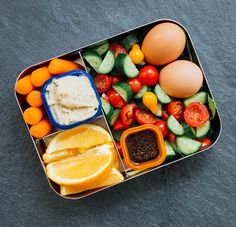
Mediterranean lunch box |
No cook salad & snack |
Mediterranean lunch box |
No cook salad & snack |
Mediterranean lunch box |
Nuts & fruit |
Rice cake w/ Peanut Butter |
Nuts & fruit |
Rice cake w/ Peanut Butter |
Nuts & fruit |
Nuts & fruit |
Mac & cheese |
Chicken tacos |
Mac & cheese |
Chicken Tacos |
Mac & cheese |
Chicken Tacos |
Nuts |
Popcorn |
Nuts |
popcorn |
popcorn |
TREAT |
EXAMPLE Shopping list (Estimated: $40 total):
Breakfast: 1/2 gallon almond milk, 4oz goat cheese
Snacks: N/A
Lunch: 8oz feta cheese, grapes, 6x tomatoes, 8oz kalamata olives
Dinner: 3c butternut squash, 8oz swiss cheese, 1lb macaroni, 20oz chicken broth
Step 2: Shop
Bring your menu, your ingredient list and your shopping list with you to the store. It’s helpful to have them all, just in case you forget how much of something you need, or if you needed a certain type/brand. For example, you list “swiss cheese” on your list, but you don’t say the size or what type. Do you need shredded or blocked? Do you need 8oz or 20oz? You may also be splitting ingredients from different menu items, so you want to make sure you buy enough. I add up all of one item and total them to make sure I buy enough. It’s the worst to get home and realize you didn’t buy enough, so you have to go back or do without.

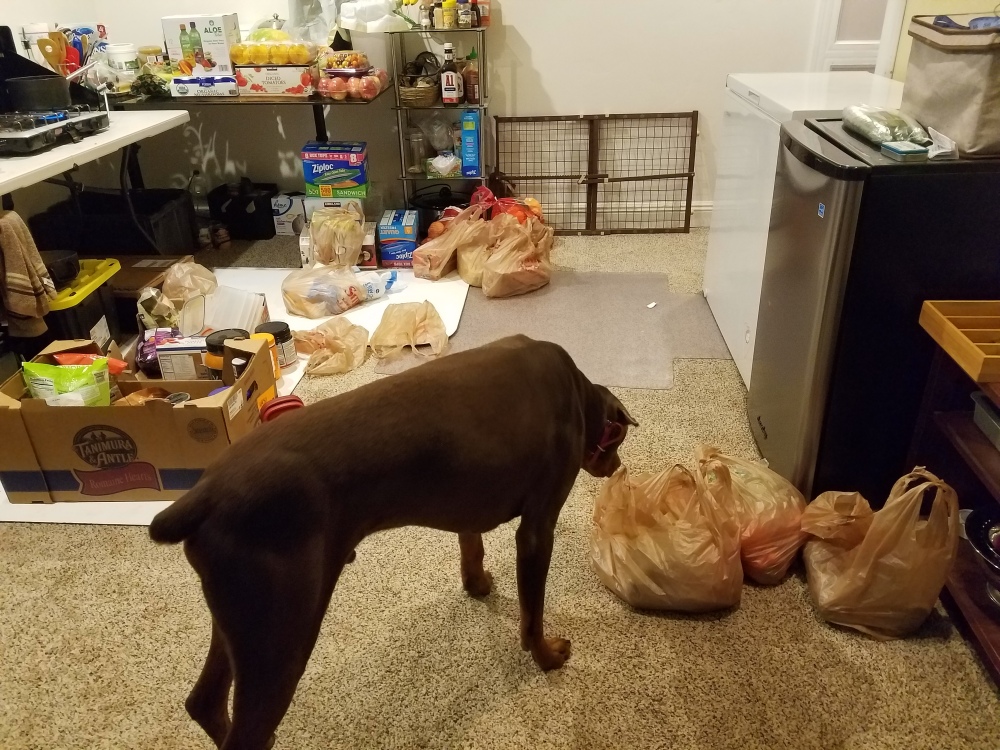
Once you are ready to shop, be prepared for your first-ever meal planning trip to be a little more expensive. This is because you’ll be getting literally EVERYTHING you need. Then, each week, you will be looking at a much, much smaller amount (as you can see my estimate above).
Once you get home, put away your freezer and refrigerator items, but leave your dry stuff out. Start preparing right away, don’t put it off or you won’t do it.
Step 3: Prep
Once you start preparing, you may get overwhelmed with how much cooking you’ll be doing. Whether you are cooking one thing or five, take it one step at a time. You’ll get better each time.
-Figure out what you will be actually cooking, and what takes the longest. If you have one recipe that includes boiling eggs, and another that is frying meat & veggies, start there. You can cut up veggies while your eggs are boiling and your meat is cooking. BAM! 3 things at once!
-As you cut up your veggies, add them to your stir-frys and meat dishes as necessary.
-Put all your excess veggies in containers and into the fridge.
-Set aside your ingredients for each recipe in their own pile on your counter. (Spices, grains, etc)
-If you have a crock pot meal, prepare all your wet ingredients and store them together. Prepare your dry ingredients and also store them separately. Then, you can add them all in one fell swoop the day you want to cook that (I typically do a crock pot meal near the middle of the week)
*TIP: Timers are your friend! You’ll get caught up cutting veggies and forget about what’s on the stove or in the oven.
*TIP: Always allow your dishes to cool before storing. This helps them keep longer, and also doesn’t shock the nutrients and kill them.
Step 4: Storage
You can use anything you need to store your cooked/no cook dishes. I try to use glass as much as possible, but this takes up more space. For those of you (like me) with limited storage space, I like to use gallon bags for your cooked meats, stir-fry type meals and vegetables. Obviously, this won’t work for soups, stews, casseroles, etc. So, find your appropriate containers and have them ready. Fridge convenience is overrated. What I mean is: your fridge may be like tetris, but that’s ok. If you have take 10 things out to get what you want, that’s fine as long as nothing gets smashed, ruined or spilled. Seriously, it’s fine. It’s not worth the 10 seconds of convenience if you have to clean up a half gallon of spilled soup.
Freeze what won’t fit, or 1/2 of your bigger meals so you can also mix it up if you need to a few weeks from now. After about 5 days of not eating your cooked foods, I would recommend freezing them anyway, just so they don’t go bad. After all that work, you don’t want to waste food and money, because then you are also wasting time.
Step 5: Packing Meals

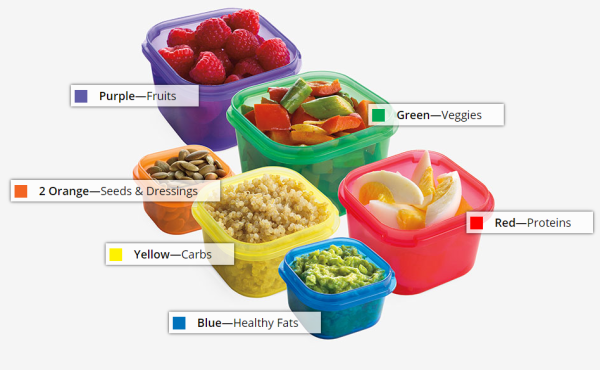
The last step is for those of you who pack your lunch for whatever reason. This is an important step for those of you with children also. I use portion size containers for daily meals, and pack them into a small cooler. Another option is using mason jars. Yes, it’s glass, I know, but if you are transporting salads or soup, this is a much better option than a Tupperware container to prevent spillage, or your salad getting smooshed and wilty.
If you are using portion fix containers, then you just add all your ingredients together onto your plate to see how much you are eating, but also so that your ingredients don’t get soggy during transport, or from sitting for hours before you get a chance to eat.

If you are using a mason jar and packing something like salad, your wet or heavy ingredients go on the bottom, and then your lighter/delicate ingredients go towards the top. Example, this was from a salad I made last week. From the bottom of the jar to the top: dressing, cherry tomatoes, grilled chicken/boiled egg, onions/bell peppers/cucumbers, greens. Then, when you transport it to a plate, just flip over the jar, and you’re good to go! No wilty, soggy greens and no mess!
I hope this article helps you get started. Don’t be afraid, just dive in and do yourself a favor! This is one of the best decisions I have ever made. I’ve taken control, and I feel so organized about it! You can too! If you have questions or comments, I would love to hear from you!